What is a Dental Implant?


Dental Implants
Why Dental Implants?
 
Dental implants are the most advanced method we have in dentistry today to replace missing teeth.  Advantages to using implants to replace teeth include:


Before
After
Astra Dental Implant System
 
Dr. Nicoara places Astra implants because the research indicates they are one of the best implant brands available. Several unique aspects in the design of these implants provide you the best long term outcome with regard to bone and gum stability around these fixtures:
Why Dental Implants? What is a Dental Implant? Peri-Implantitis Astra Dental Implant System
OsseoSpeed implant surface coated with Fluoride to promote bone healing around the implant.
 
MicroThreads to distribute chewing forces.
 
Conical Seal Design to maintain bone around the implant.
 
Connective Contour to maintain gum stability around the implant.
A free standing tooth replacement:
Unlike a bridge, the implant does not involve the adjacent teeth for support. This means that if something goes wrong with a bridge, at least 3 teeth would need to be treated to fix the problem, whereas with an implant, only the one tooth space is dealt with.
 
Ease of cleaning:
No special instruments are necessary to clean the implant other than a regular toothbrush and floss, unlike a bridge which requires extra tools for proper maintenance.
 
Long term restoration:
The implant fixture should remain in your bone for the rest of your lifetime.
Peri-Implantitis
 
 
All of these characteristics contribute to their superior performance. You can click here to access Astra’s Patient Education portion of their website to find out more about Astra Implants and how they can help you look and feel better about your teeth!
Straumann Dental Implant System
Single Tooth Replacement
 
For Dr. Nicoara’s patient below, the front tooth on the left had been injured years before after being hit in the face during a sporting match. Even though a root canal had been done in the past (the white vertical stripe in the center of the tooth on the xray) the tooth did not survive. The dark areas around the sides of the tooth on the xray are where the tooth was crumbling. Bone grafting was necessary at the time of tooth removal and implant replacement (by Dr. Nicoara), with a new crown (by Dr. Thomas Junge in Seattle) after 4 months of healing.
Single Tooth Replacement with Treatment of Adjacent Teeth:
 
Case 1
In the case above, only the tooth needing to be replaced was treated. Often times, adjacent teeth need to be treated to achieve optimal esthetic results. For Dr. Nicoara’s patient below, the tooth replaced with an implant had a gum graft to reduce the recession and bone grating to fill the socket space, while the tooth adjacent had gum and bone trimmed away to level the gum margins. New crowns (by Dr. Amy Norman in Everett) were placed on the teeth adjacent to the implant in order to match the implant crown and improve the tooth colors and shapes to satisfy the patients esthetic ideals. Click here to read Julie’s testimonial.
 
Single Tooth Replacement with Treatment of Adjacent Teeth:
 
Case 2
For this patient of Dr. Nicoara’s, gum grafting of the teeth to the right of the missing tooth was necessary to restore gum health. The space where the implant was to go was also thin with regard to the width of the bone available for the implant, so gum grafting was extended to the implant space. This improves the ridge dimensions to reduce food entrapment and assist the patient in achieving optimal oral hygiene which is critical to the long term health of the implant. The crown was made by Dr. Ted Forman in Mukilteo.
Before
After
Before
After
Multiple Tooth Replacement
 
For this patient of Dr. Nicoara’s, a traumatic injury with a horse during childhood resulted in the eventual loss of all of the front teeth. The implants with bone grafting provided a replacement for the failing teeth, and a stable long term solution. The final bridge was done by Dr. Jesse Boyett in Shoreline.
Straumann Dental Implant System
 
Dr. Nicoara also places Straumann implants. Exclusive to the Straumann system are design qualities which increase the strength of these implants over other implant brands (ex: Roxolid titanium zirconium alloy), as well as increasing the speed of osseointegration (ex: SLA Active surface) so that you can have a crown on your implant to chew with faster than with other implant systems. Fully ceramic metal-free Zirconia implants are also available. Visit Straumann’s Patient Education portion of their website.
1. 45 degree shoulder to maintain gum stability around the implant.
 
2. Smooth neck section to enable enhanced tissue management.
 
3. Morse taper connection to maintain bone around the implant.
 
4. Internal octagon to enable greater flexibility in final crown position.
 
5. SLActive surface to enhance and promote more rapid bone healing around the implant.
  3125 Colby Avenue, Suite H    Everett WA 98201   P: 425-374-5380  F: 425-374-5382   office@nicoaraperio.com
The Process
The Process
 
As mentioned above, implants can sometimes be a time consuming process, but the long-term benefit generally outweighs this disadvantage. There are several steps in the process, the first being the first being the planning phase, then surgery to place the implant, and temporization to achieve an ideal final result.


Planning

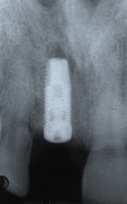
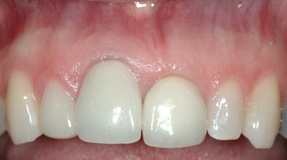
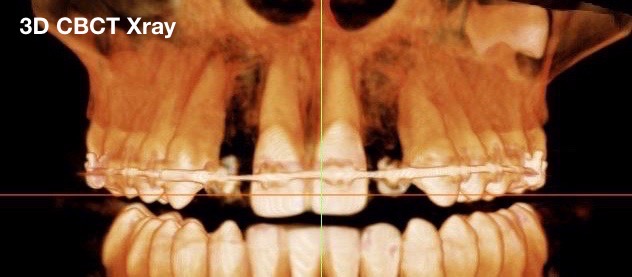
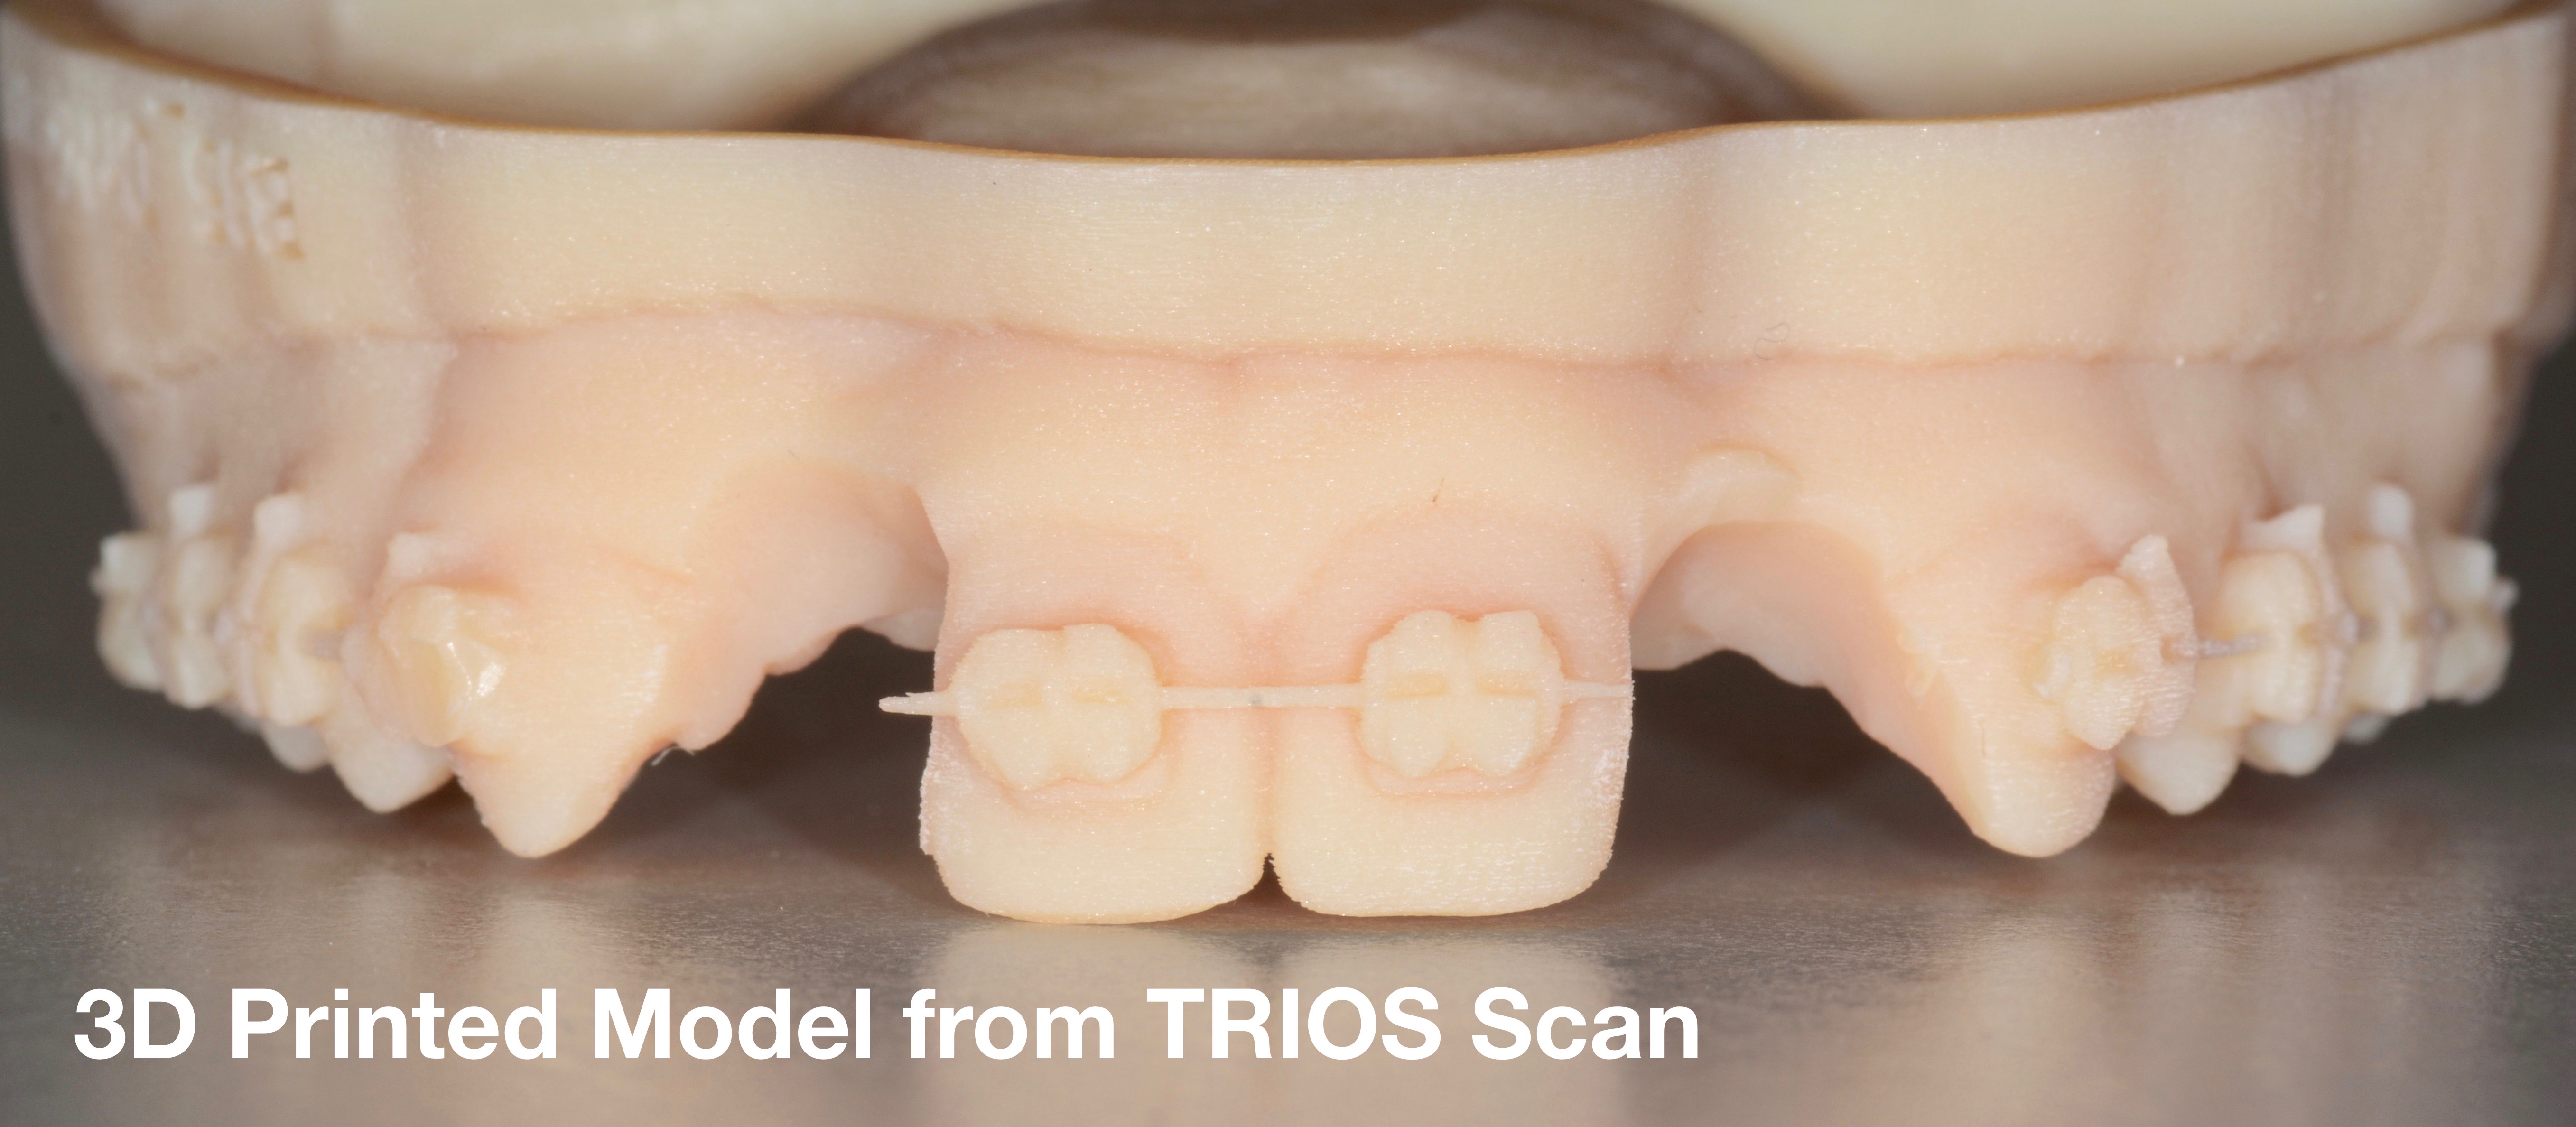
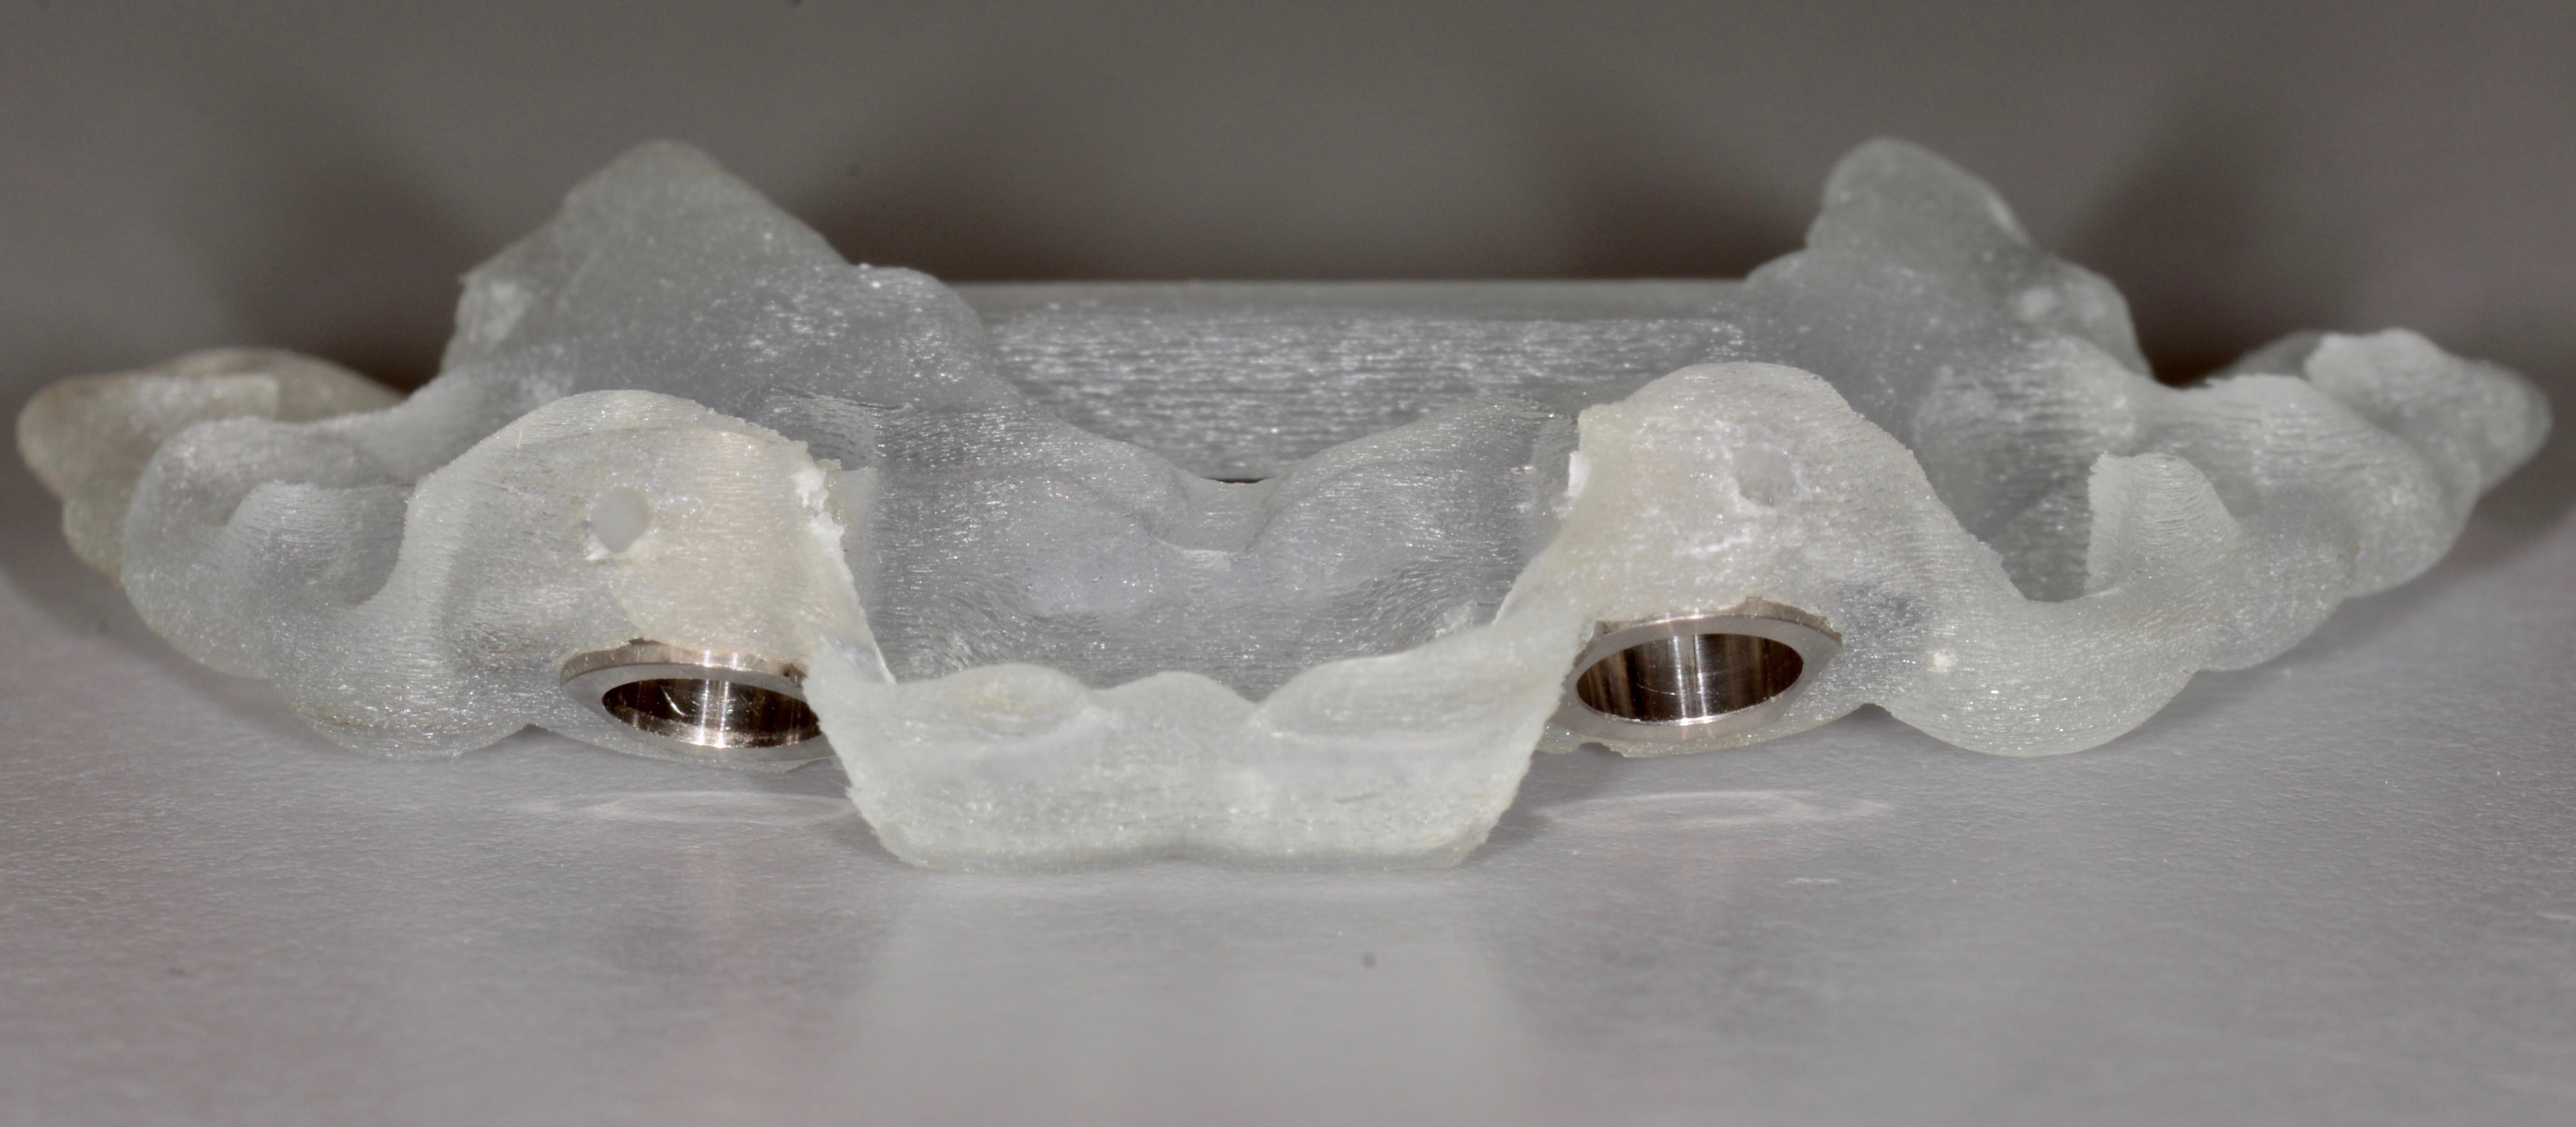
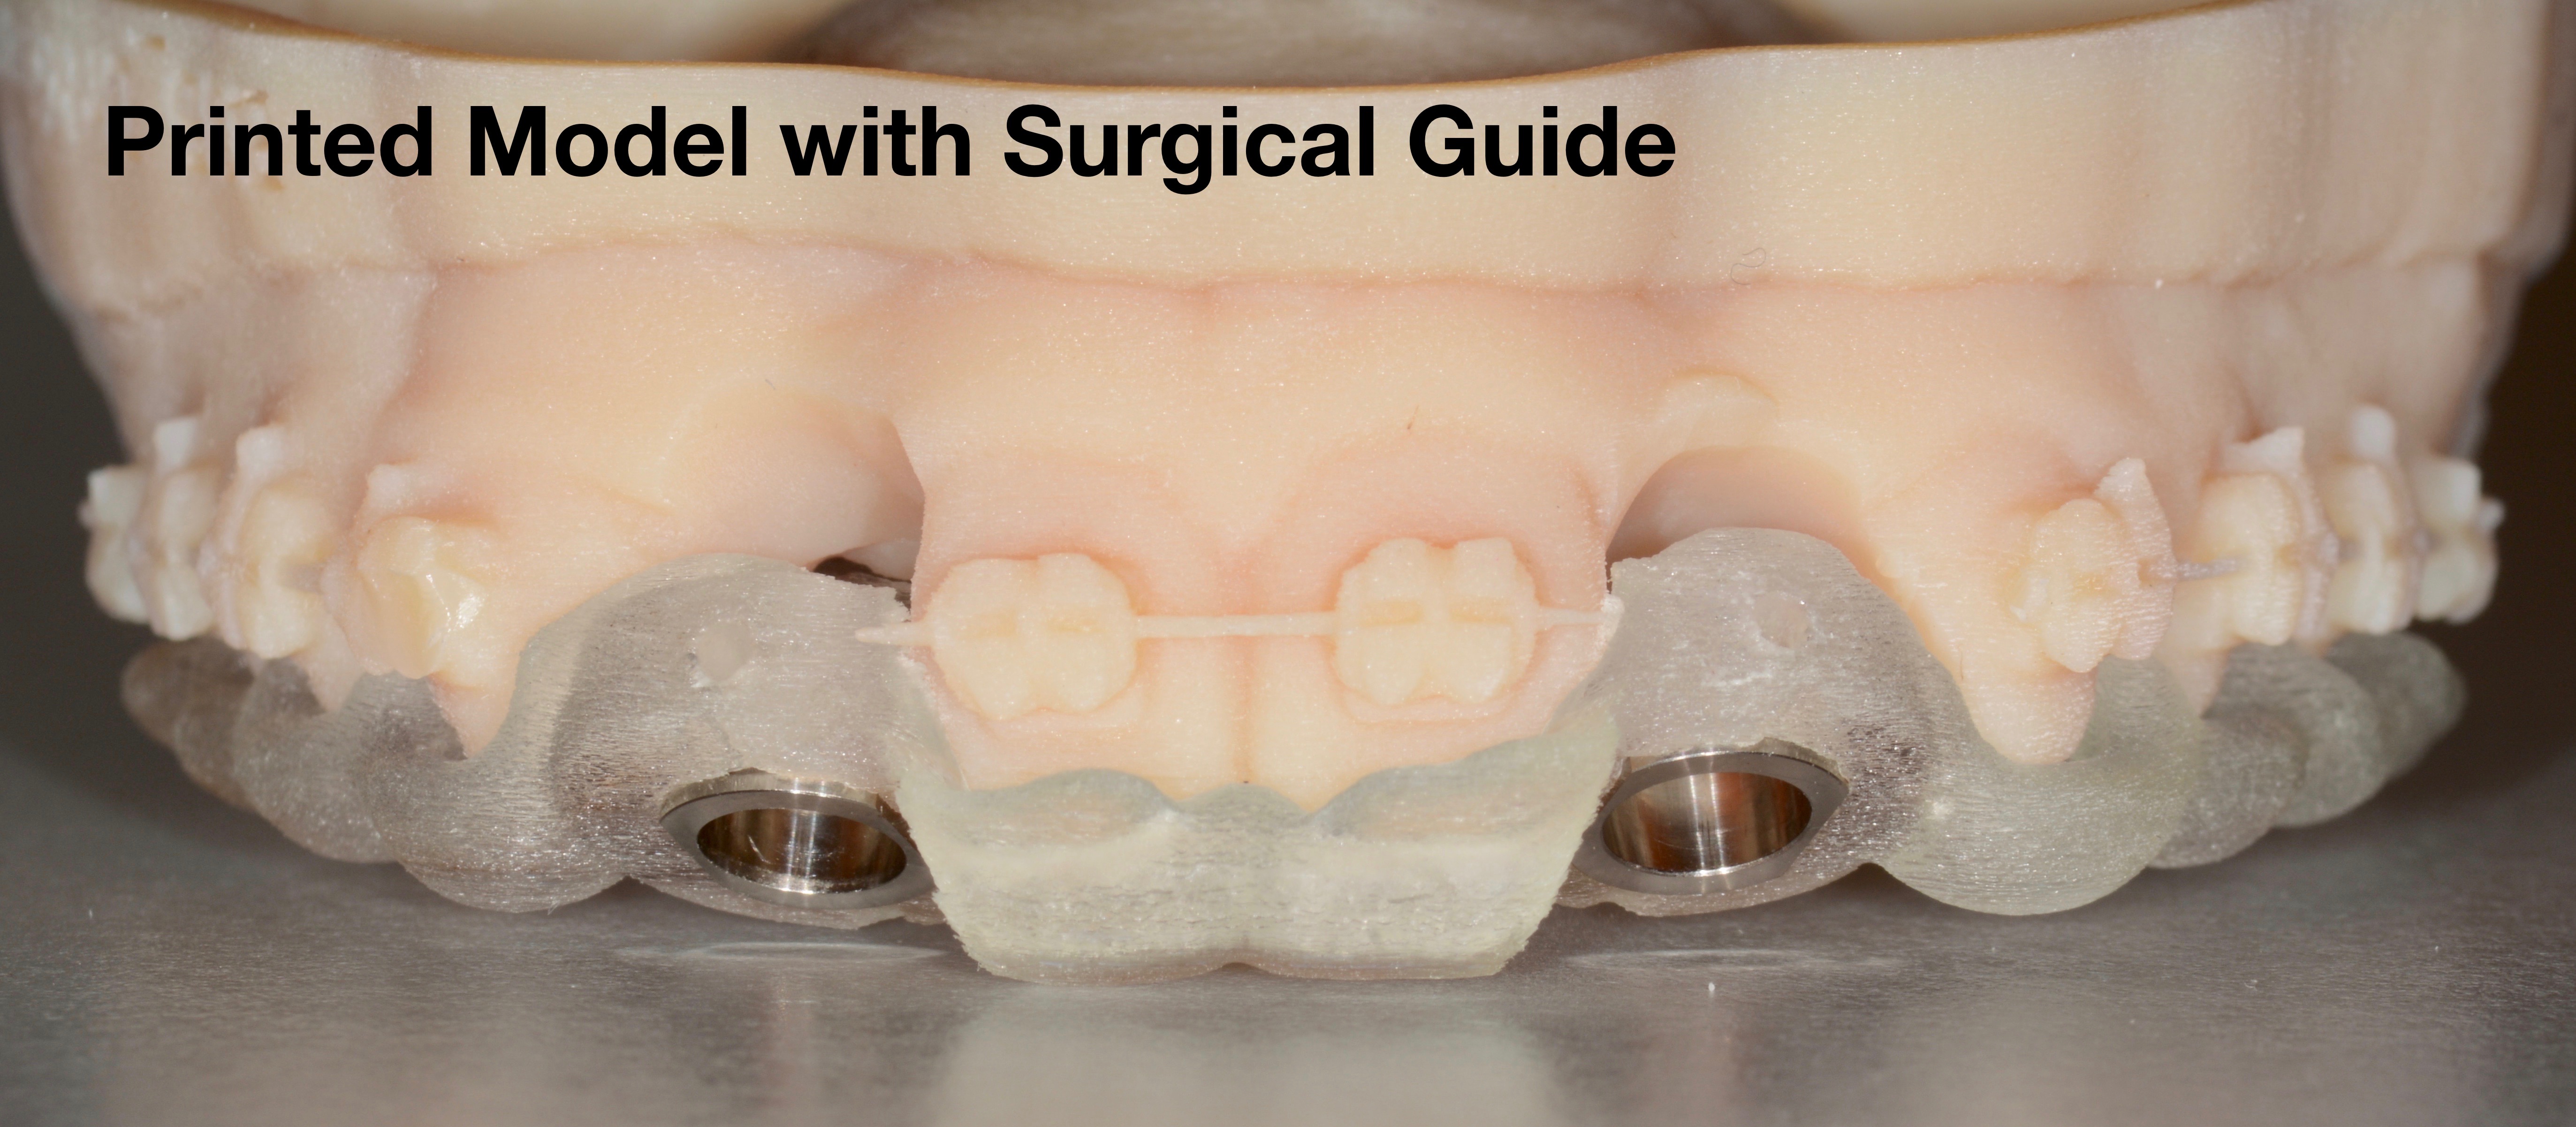
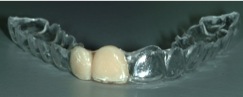
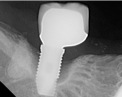
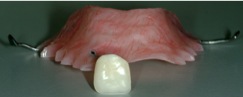
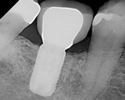
Xrays are taken to verify bone levels and proximity to vital structures such as sinus cavities or large nerves. In most cases, a 3D xray called a CBCT is taken to accurately identify anatomy in order to select the appropriate implant size and shape. Digital impressions with a TRIOS oral scanner are also obtained, and in combination with the CBCT, a surgical guide is created for the most accurate surgical implant positioning. The TRIOS scan is also used to fabricate temporary tooth replacements shown in more detail further below for front tooth implants in particular.

Implant Placement Surgery
 
On the day of your surgery, local anesthetic is used to numb the area that will be worked on. An oral sedative or IV sedation are also available if desired. In nearly all cases, bone and soft tissues will be deficient in some way. Even if soft tissues are in an ideal position, surgical access generally results in shrinking of tissues during healing. Therefore, grafting of bone and gum tissues are needed to prevent this shrinkage, or rebuild the missing tissues. This is explained in more detail below. We know tissues generally don’t improve with age. We also know that the more robust the tissues are around the implants, the longer the implants can last. The implants should ideally last you a long time, so starting with the best foundation possible is critical to avoid not only esthetic issues, but also areas where food may want to collect and make hygiene more difficult. Even though implants can’t get cavities or need root canals, they can still have infection causing bone loss, shortening the life of the implant.
 
Socket Grafting at Implant Placement
When implants are placed at the same time a tooth is extracted, the socket is usually always bigger than the implant diameter used to replace the tooth. This means that there is a gap between the implant and the socket walls. Bone naturally shrinks when there are spaces to shrink into. In order to prevent this shrinkage, and maximize the natural appearance of the gum that the implant crown emerges from, bone grafting is nearly always done at the time of extraction, and often done at the time of implant placement even if the extraction was done earlier since bone shrinks after the extraction. The images below are of areas where bone is thin, and where the socket is wider than the implant diameter to be placed (yellow arrow).
Gum Grafting at Implant Placement
Gum grafts are used to help make sure the gum stays in a natural position. The gum wants to shrink after a tooth is removed, so in situations where apperance is very important, gum grafts are used to prevent recession over time. Two cases are presented below: one where a gum graft was used at the time of surgery, and one which did not have gum grafting. Over time, the gum starts to recede away.
At time of placement of final restorations
With Gum Graft
Without Gum Graft
One year after placement of final restorations
Temporary Tooth Replacement:
 
Missing teeth can be temporarily replaced with removable or fixed options. Explanations for each time are provided below.
 
Removable Appliances
It generally takes 3-4 months for the implant to heal in the bone before the final crown can be placed. If the crown is put on the implant before it has healed in the bone, it can potentially cause the implant to come out. While waiting for the implant to heal, there are two types of removable appliances used to hide the fact that the tooth is missing: Essix and Flipper. The Essix is used where there will be a good amount of swelling and we don't want anything touching the gum which could impede it's healing. Any time gum grafting is done, for example, an Essix is used. The Flipper is used either after the Essix once swelling has subsided in 2-3 weeks, or from the day of surgery onwards if no significant swelling is expected.
Implant in bone with abutment
Final crown cemented on abutment
Non-repairable tooth
Thin bone at top of implant
Socket space in front of implant where bone graft will be placed
Implant in bone, waiting for healing prior to final crown placement
Non-repairable tooth
Implant with final crown
Implant with healing cap, waiting for healing prior to final crown placement
Implants with
abutments
Implants abutments
with final crowns
Essix
Flipper
The essix is usually used only for a few weeks after surgery to allow for swelling to subside as it sits on the teeth rather than on the gums as a flipper does.
 
If a tooth is present and the implant cannot be placed the same time the tooth is removed (as is the case for molar teeth), an additional 2 months of healing are required prior to implant placement surgery.
 
Fixed Appliances
For highly esthetic cases in the front of the mouth, our office will fabricate a temporary implant crown made of plastic which looks very similar to the final crown that is screwed into the implant (see images below). Rather than being supported by the adjacent teeth or soft tissues as is the case with a flipper or essix appliance, this temporary crown is screwed into the implant is used for shaping the tissues into their most ideal form before your dentist makes the final crown that is screwed into the implant. The plastic temporary crown can be adjusted as necessary to make sure the gums are as natural looking as possible. Below are two cases to help understand the importance of the temporary crown to shape the tissues. One final crown is made without using a temporary, and one is made after using a temporary crown.
 
Welcome        Dental Implants        Periodontitis        Non-Surgical Services        
Surgical Services        Patient Information        Referring Doctors        ProbeTips        
Meet Us        Contact Us        Site MapWelcome.htmlPeriodontitis.htmlNon-Surgical%20Services.htmlSurgical%20Services.htmlPatient%20Information.htmlReferring%20Doctors.htmlProbeTips.htmlMeet%20Us.htmlContact%20Us.htmlSite%20Map.htmlshapeimage_10_link_0shapeimage_10_link_1shapeimage_10_link_2shapeimage_10_link_3shapeimage_10_link_4shapeimage_10_link_5shapeimage_10_link_6shapeimage_10_link_7shapeimage_10_link_8shapeimage_10_link_9shapeimage_10_link_10
 
  3125 Colby Avenue, Suite H    Everett WA 98201   P: 425-374-5380  F: 425-374-5382   office@nicoaraperio.com
 
Implants, similar to teeth, can experience bone loss.  This is referred to as ‘Peri-Implantitis’ rather than ‘Periodontitis’.  Regular cleanings and your own daily oral hygiene can prevent such bone loss from occurring.  You can read more about prevention of bone loss on the Periodontitis page, or by clicking here. Special surgical techniques can be used to attempt to arrest and sometimes regenerate the bone around the implant.  Sometimes the implant cannot be saved and must be removed.
Healthy Bone Level
Peri-Implantitis
Implants are metal screws made of titanium (the same material used in hip and knee replacements) or zirconia (metal-free ceramic) which are placed into the bone to replace a missing tooth or a group of missing teeth. Titanium and Zirconia make a special bond with bone via an oxide layer called osseointegration. It takes at least 6 weeks for this process to be completed so that an implant is integrated to the bone.  After osseointegration, the crown or bridge, or even a denture, usually connected to the implant by a piece called the abutment, can be fitted to the implants by your dentist so you can begin to chew and function on them. Sometimes it takes longer than 3 months for the implant to integrate to the bone, depending on the quality of bone that the implant is placed into, or if there is a bone graft or sinus graft placed at the same time. You can learn more about bone and sinus grafting on the Surgical Services Page.  Below are ‘Before’ and ‘After’ photos of teeht replaced by implants.
Implant
Abutment
Crown
Tooth
Gum
Root
Bone

In the end, it could be as little as 6 weeks from the time of implant placement to the time you see your dentist for the final crown, or it could be as long as a year before the process is complete. This timeline may help organize things for you.
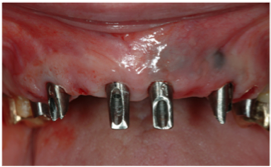
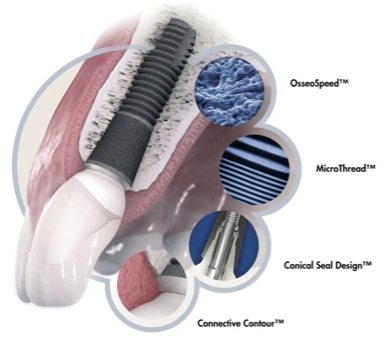
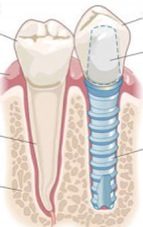
Healing 3 months after implant placement, prior to temporary or final crown
Poor soft tissue esthetics and square crown without using temporary to shape gums
Beautiful soft tissue contours and natural crown shape after using temporary to shape the gums